Showing posts with label Fabric Manipulation. Show all posts

Sunday, July 22, 2018

Fabric Manipulation #2 and Upcoming Cutting Edge Group Show at Studios on the Park

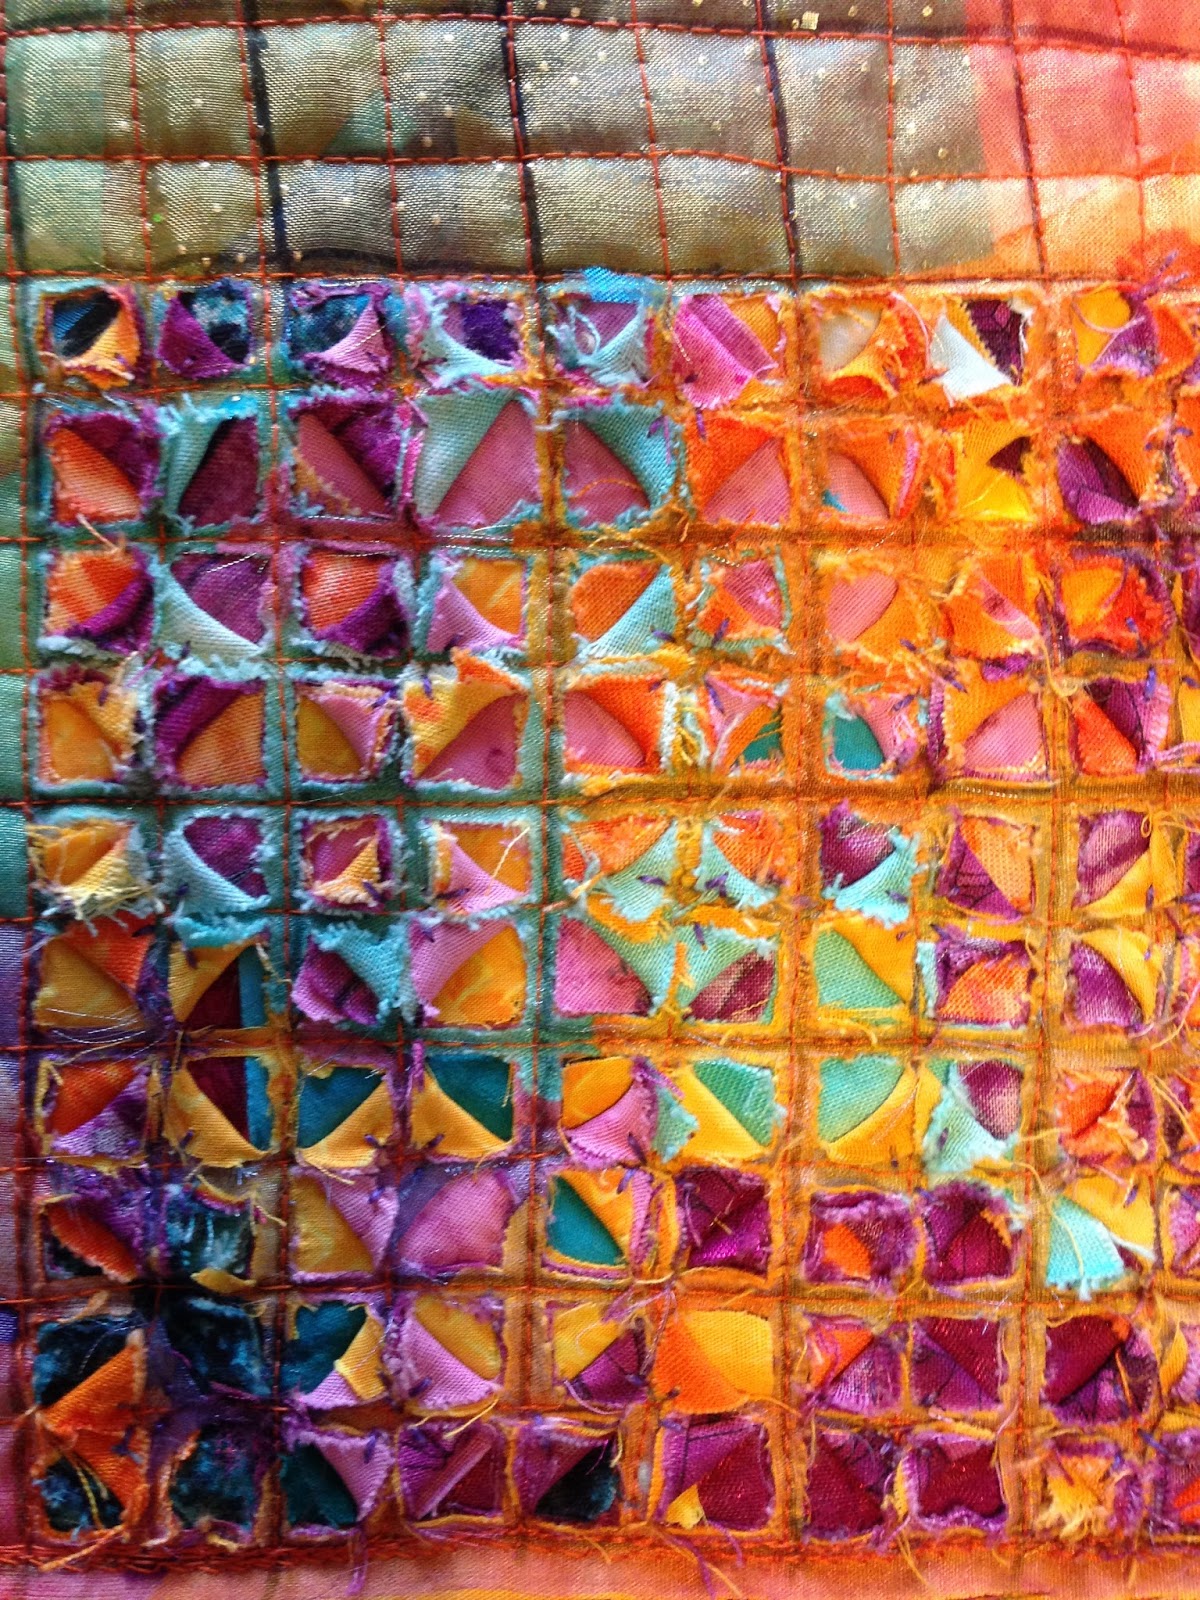
I've been working on another fabric manipulation piece using the 'blooming grid' technique.
The inner piece I made a couple years ago and really liked but never did anything with it until now.
It wasn't 'blooming' as much as I wanted it to, so I decided to use some stitching to open it up more to reveal the lower fabrics. I stitched it to a piece of ice dyed fabric
 and couched eyelash yarn around it.


Below is a close-up of some of the center 'blooms.'


Our Cutting Edge Fiber Art Group will be having a show at Studios on the Park in Paso Robles. 
Below is the poster with more information.  
We have had two prior shows there one in 2012 and one in 2014.

We will be offering two classes, one in fusing fabrics to create an art quilt and another in using acrylic paints  with a variety of techniques to create textures and more on fabric. 
The cost for each class is only $15 for materials.
 If you are interested in either or both classes, email or call me. 
 Such a deal and great fun is guaranteed for all! 
 Hope you will be able to join us for the opening art reception on August 4th.


Sunday, February 18, 2018

Fabric Manipulation and Feather Stitch

This week I've been working more on my fabric manipulation piece,
 slashing away at it and stiching down triangles of fabric.


I've also been doing more embroidering on the soy-waxed, ice dyed vintage tablecloth, as part of the Take a Stitch Tuesday Challenge.  This week's stitch was the feather stitch. 


I did an open and closed feather stitch as well as eighty plus french knots. We have a lot of trees in blossom right now due to the unseasonably warm weather we have been having, so that was my inspiration for this week's design.


Thursday, January 4, 2018

Fabric Manipulation - Slashing through layers of fabrics

I'm progressing on my 'blooming' squares piece. It is very labor intensive, but I am enjoying the process.  Opening up every little square and choosing what I wish to unveil is a lot of fun! It's like opening up little presents. I've always related to the theme of layers. People and life itself  are made up of so many layers. Often we only see the surface of the top layer  unless we dig deeper. 


Here are the scraps of fabrics laid on top of batting in center.


I placed a piece of organza on top and stitched a half inch grid through all layers.


 This picture and the one below show how I have cut open each square
on two sides. Next I insert a needle from below up through the corner of the square and then through the top of the triangles of fabric to pull them back to reveal whatever layer I decide upon. 


This is as far as I am so far. Many more little presents to open.


For more information on this technique check out Fay Maxwell's youtube video on 'slashing.'

Thursday, December 14, 2017

More Progress on New Project

I've been working on  a new project.  For this project you need to quilt the border first,
 as it would be to difficult to quilt after the center is finished. The center will  be done
 in a fabric manipulation technique.


The piece pictured below was done a couple of years ago, and is similar
to what will be in the center of my new piece, yet different. 


Monday, February 2, 2015

Manipulated Fabric Samples

Since the free  guild workshop a couple of weekends ago, I've been intrigued with manipulating fabric. I checked out a book from our library entitled The Art of Manipulating Fabric, by Colette Wolff.

 Actually it's the second time I've checked it out.  It is an incredible collection of great techniques to create 3D folds, tucks and more.  I've also been re-reading Fantastic Fabric Folding by Rebecca Wat.


 I love her twisted rose blocks, but found another way to do them, since her way wasn't working for me.   I made them similar to how you make the chop key blocks, but put three folds on each  side rather than just one in the center.  Because of the extra folds, I started with a 5 inch block for the top and a  3 inch block for the muslin under it, to which you secure the folds. Below are some of my new blocks.


Mock pin tucks using a double needle.


Twisted  rose blocks above with a closeup below


Monday, January 19, 2015

Guild Workshop on Fabric Manipulation Techniques

Our Almond Country Quilt Guild sponsored a workshop on fabric manipulation techniques Saturday. I had a lot of fun and learned some new techniques as well.  Our teacher, Denise was excellent, friendly, enthusiastic and even made us very creative fun stuffed fabric face pins.


These are my all my samples with a couple other fabrics I'm auditioning with them.  Not sure how I will use them yet, but have lots of ideas.


This is a piece where we made tucks and folded them different way to create the design.
  Next time I think I'll use thread that matches the fabric. Adding beads to all the folded 
intersections will add a lot of interest.


The top row are Chop Keys, made from having a larger square sewn and folded to a smaller one to create the diamond in the center.  The bottom one is done in a similar way but with hexagon shaped fabrics. I still need to add a bead or small button to the center of the diamond shape.

How great that our guild offers these free workshops. It's also a great way 
to get to know other guild members.